

How To Update Grub In Ubuntu
1 of Linux'due south ISO files' best features lets y'all look at it before installing it on your machine. You can run a live test on your system; subsequently, you can choose if you want to install it or not. This characteristic is non only helpful to test drives; it can assist to recover your operating system if you accidentally remove or mess upward with the Chow bootloader. The Grub is the short form of GNU Chiliad Unified Bootloader, commonly chosen GRUB bootloader. If you have a Ubuntu live CD or a USB live stick, y'all can repair the Grub bootloader and save your operating system.
Repair the GRUB Bootloader
The GRUB bootloader files are stored inside an EFI filesystem on a Linux organisation. Yous tin can damage your GRUB files in many means. One of the major reasons for damaging the Grub files is having multiple bootloader directories for different distributions and operating systems.
Using Ubuntu and Windows together in a dual boot system is commonly used very oft. If you're not conscious nigh partitioning the bootloader files for Windows and Ubuntu, yous probably end upwards mismatching with the Grub bootloader. This post volition see 3 unlike methods for repairing the GRUB bootloader using a Ubuntu Live USB bulldoze.
Method 1: Repair Chow Bootloader with Ubuntu Server Live Deejay
Using a Ubuntu server ISO file to repair a Ubuntu desktop or server is clever considering the ISO server file size is smaller than the desktop LTS file. It takes a curt time to make a bootable file and quick to boot. Hither, we will see how to utilise the Ubuntu server ISO file to recover and repair the Grub bootloader file on Ubuntu.
Step one: Download Ubuntu Server and Create A Bootable Disk
In the very first step, you might need to download the ISO file of the Ubuntu server if you don't have the live CD or a spare USB stick. Y'all can click on this link to achieve the server ISO file for downloading. When the download finishes, you use Ubuntu's default Startup Disk creator application to make a bootable USB disk.
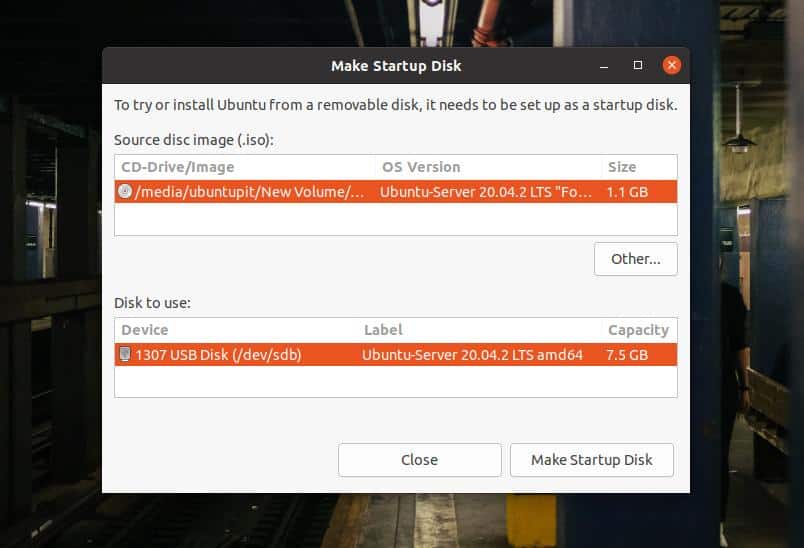
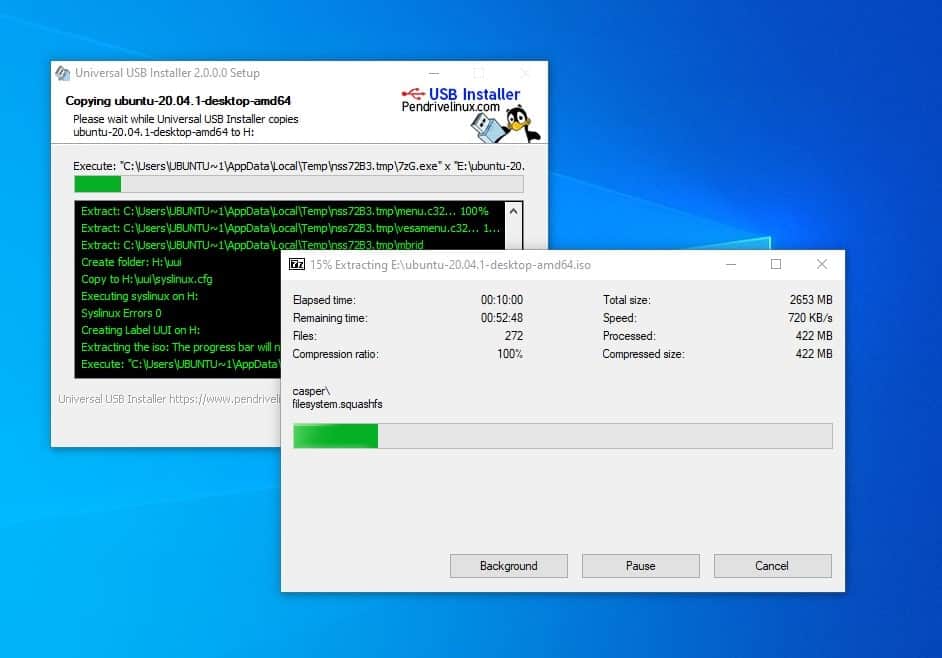
If you lot're using a Windows automobile, you can utilize the UUI tool to make a Linux bootable file, information technology'southward easy, and the steps are self-explanatory.
Step ii: Enter the Rescue Way
Later on creating the bootable deejay, insert it on your reckoner and power your system on. And then yous demand to press the office cardinal from the keyboard to select the bootloader card. In near laptops and computers, the kick menu function appears in ESC or F9 cardinal. You can find the boot bill of fare key for your auto by googling information technology.
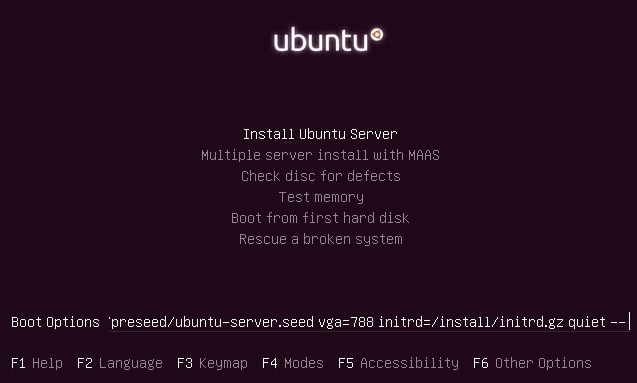
When the showtime kicking screen appears, press the F6 push button to enter the Skillful mode. In the Skillful mode, you tin can edit the boot options. To enter the broken image rescue mode, you demand to write the following rescue value given below.
rescue/enable=true

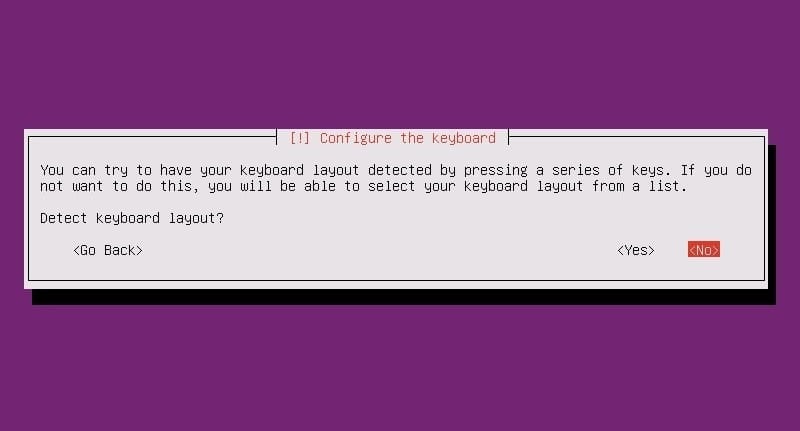
When information technology boos successfully, you need to select the language, keyboard format, and other configurations to start with the live USB stick.
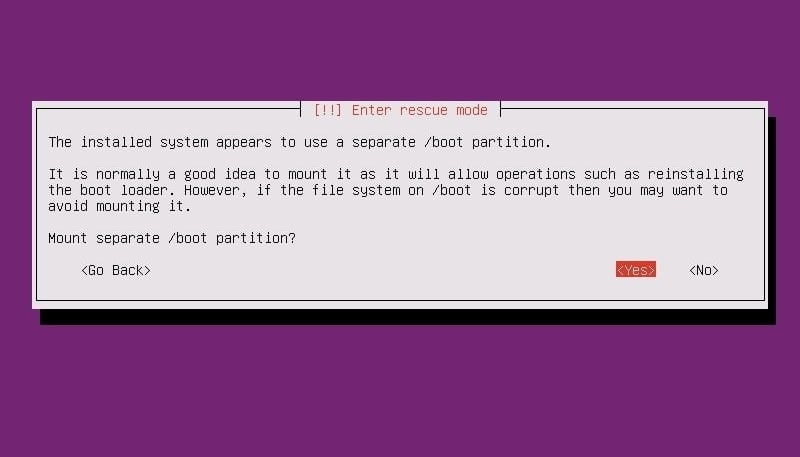
Pace 3: Mount the Disk Partition
In this pace, you will need to set the boot partition, mount the live disk, and rescue the Chow loader. You tin choose if you need to re-install the Chow bootloader or you lot but need to repair information technology with simple efforts.
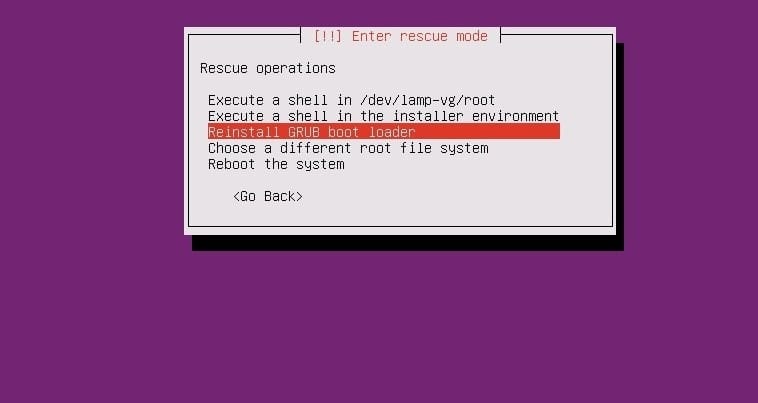
Step four: Repair the GRUB Bootloader and Reboot
In this step, the drop-down menus will appear, and you can select options to repair and reinstall the GRUB bootloader on your Linux organisation. You might see this window again when the boot repair finishes rebooting your system. If you lot don't need to reinstall the entire GRUB loader, you can select the first option to open up a shell to run a few commands for boot repairing.
When the trounce appears, you tin can run the following command lines chronologically to repair the bootloader. Brand certain y'all've replaced the sda with your own directory value.
# ls /dev/sd*
# chow-install /dev/sda
# exit
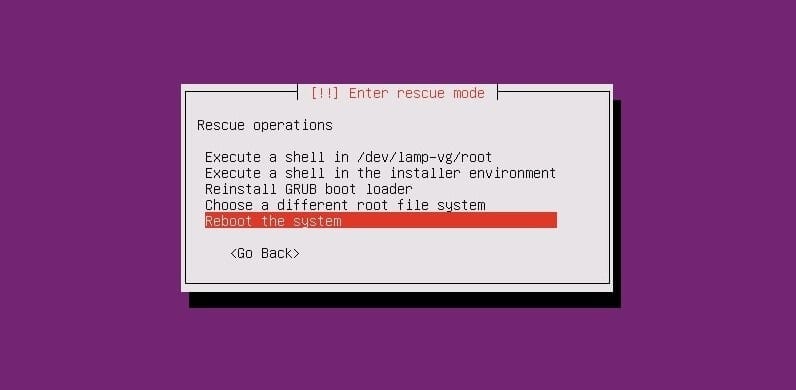
The Grub bootloader won't take very long; when the boot rescue finishes, you tin reboot your system to get the GRUB bootloader dorsum.
Method ii: Repair Chow Bootloader Using A Desktop Live CD
Using a Ubuntu desktop ISO is pretty similar to using the server ISO live USB stick. In this method, nosotros will use the latest Ubuntu ISO file and burn it to a USB drive. You can follow the steps shown previously to burn the ISO file.
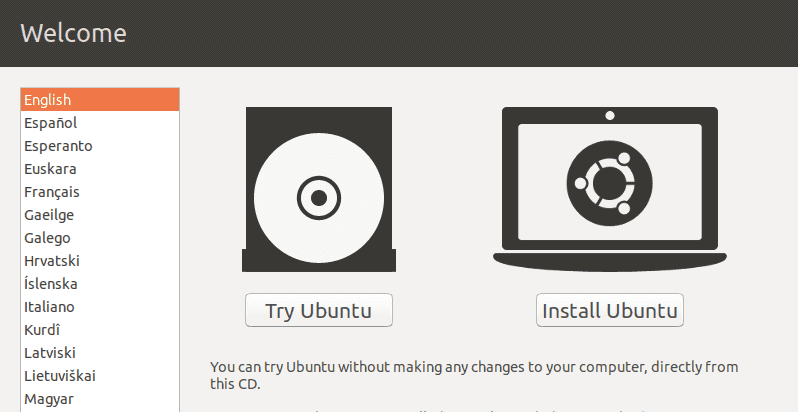
Step i: Endeavor Ubuntu Alive Session
After making the bootable USB stick, insert it into your calculator and boot Ubuntu on your estimator. Here, despite choosing the Install Ubuntu push button, we will press on the Try Ubuntu button to employ Ubuntu every bit a alive ISO file. When the outset startup folio arrives, you will need to put the keyboard layout, time zone, and other related information to become started with Ubuntu Live.
Footstep two: Install Grub Repair Tool
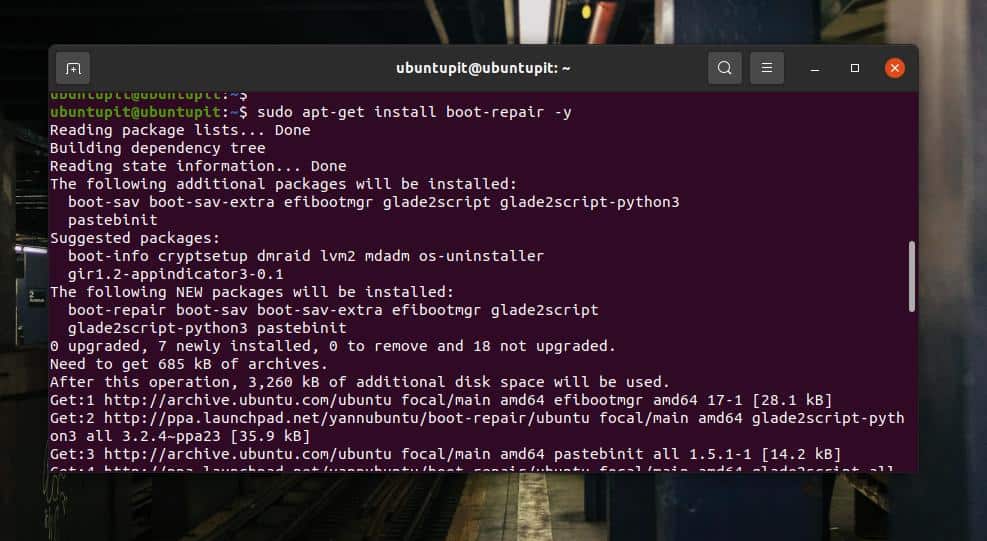
As we are using the live USB disk, we won't require any root privileges to run the sudo commands. Now, brand sure that you have an active internet connectedness on your estimator. You can now the post-obit commands to install the GRUB bootloader repair tool on your system.
sudo apt-add-repository ppa:yannubuntu/kicking-repair
sudo apt-get update
sudo apt-get install boot-repair -y
When the installation finishes, run the following command to open up the kicking repair tool. You can as well discover it on the height bar application card.
boot-repair
Step three: Repair Bootloader on Ubuntu
On the offset screen of the Grub kicking repair tool, you would encounter the Chief options, Grub Location, Chow options, and other helpful tabs. In the Main options, you will find checkboxes to reinstall and repair the Grub bootloader on your Ubuntu machine.
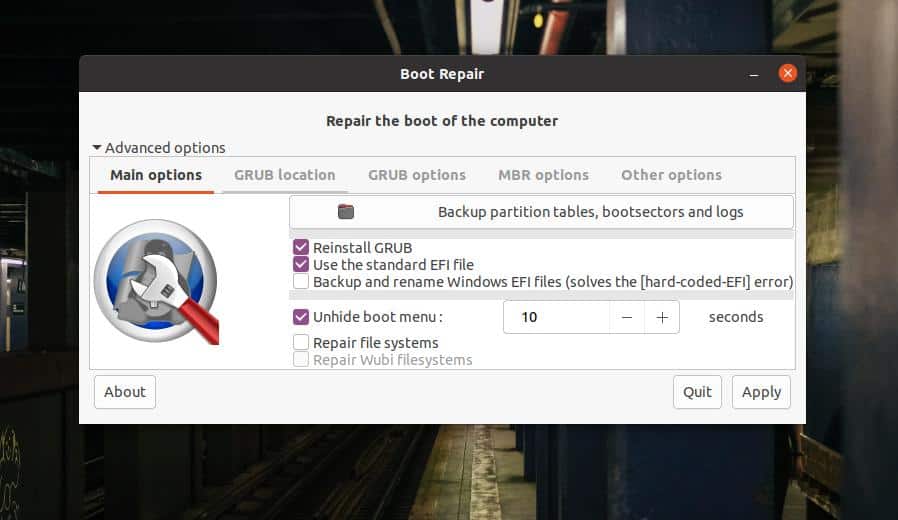
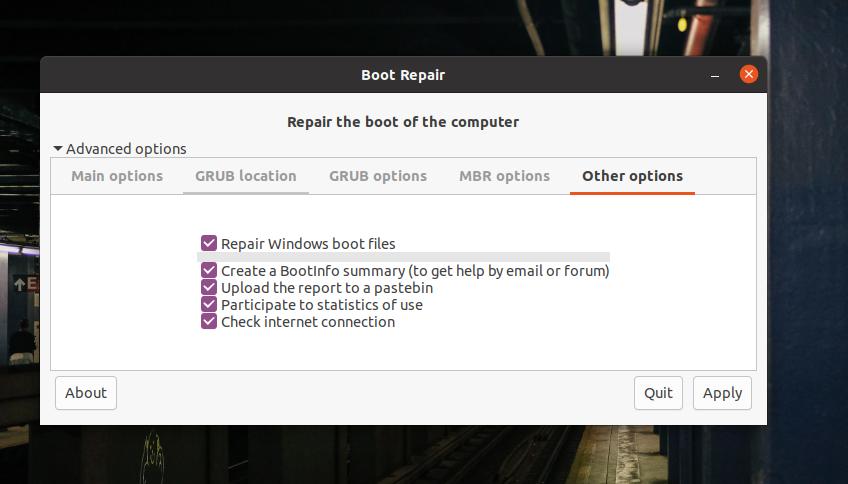
Utilise the EFI file to select the Chow location if you take separate directories for root and GRUB files. If your system runs on an MBR partition, await inside the MBR options to encounter the MBR boot repair options. In the Other options tab, yous will find choices to rescue the bootloader files of Windows or other operating systems.
At present, to repair Ubuntu's Chow bootloader, select the 'Main options' and select 'Reinstall Chow', then go along with the Apply push button. The entire process won't take more than five minutes to complete. If your filesystem has additional partitioning errors, it volition also detect and show you the issues.
Footstep 4: Reboot The System
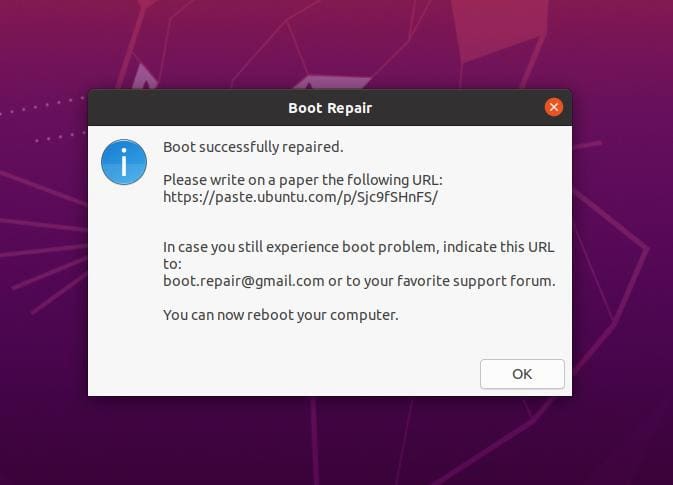
After a successful Chow bootloader repair, a 'Boot successfully repaired' message will appears on your screen. It will provide a URL where yous will find all the information regarding the kicking repair. You tin at present reboot and system and kick your organisation with the repaired Grub bootloader.
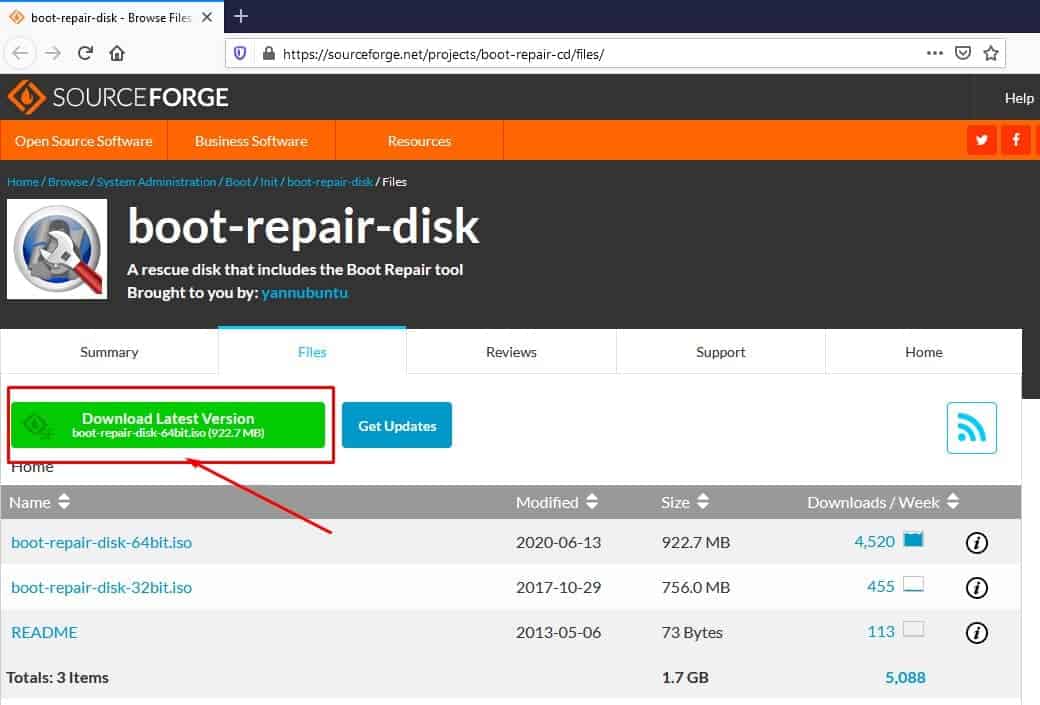
Till now, we accept used a live CD/USB disk of the Ubuntu desktop/server to repair the Grub bootloader. In that location are options to repair the bootloader with a defended Grub bootloader ISO file. Yous can download the Chow loader ISO file and brand it bootable instead of using the desktop/server ISO file.
Final Words
In a multi-boot desktop arrangement, you demand to exist careful using the bootloader files. If you mess something upwardly, you lot don't need to install the entire Bone over again. In the unabridged post, we've seen how to repair the Chow bootloader on a Ubuntu machine. If you discover this mail useful and informative, delight share information technology with your friends and the Linux community. Yous can as well write downward your opinions regarding this post in the comment department.
Source: https://www.ubuntupit.com/how-to-repair-the-grub-bootloader-using-a-ubuntu-live-usb-drive/
Posted by: demelowhork1992.blogspot.com
0 Response to "How To Update Grub In Ubuntu"
Post a Comment